Connecting to your SureVue
- Web Interface : If your player has an ethernet cord connected with a valid IP address, you will be able to connect to by typing the IP address into a URL from any browser. You will then be presented with a login which will allow you to connect to the player’s web interface for configuration.
- Keyboard & Mouse : If you prefer setting up the player using a keyboard and mouse, the USB ports on the player can be utilized during local configuration
Power and Display
To set up your SureVue, you must first plug in the provided power adapter, as well as display. Once this is done, you will be presented with three options, including display configuration, network settings, and content management system configuration.

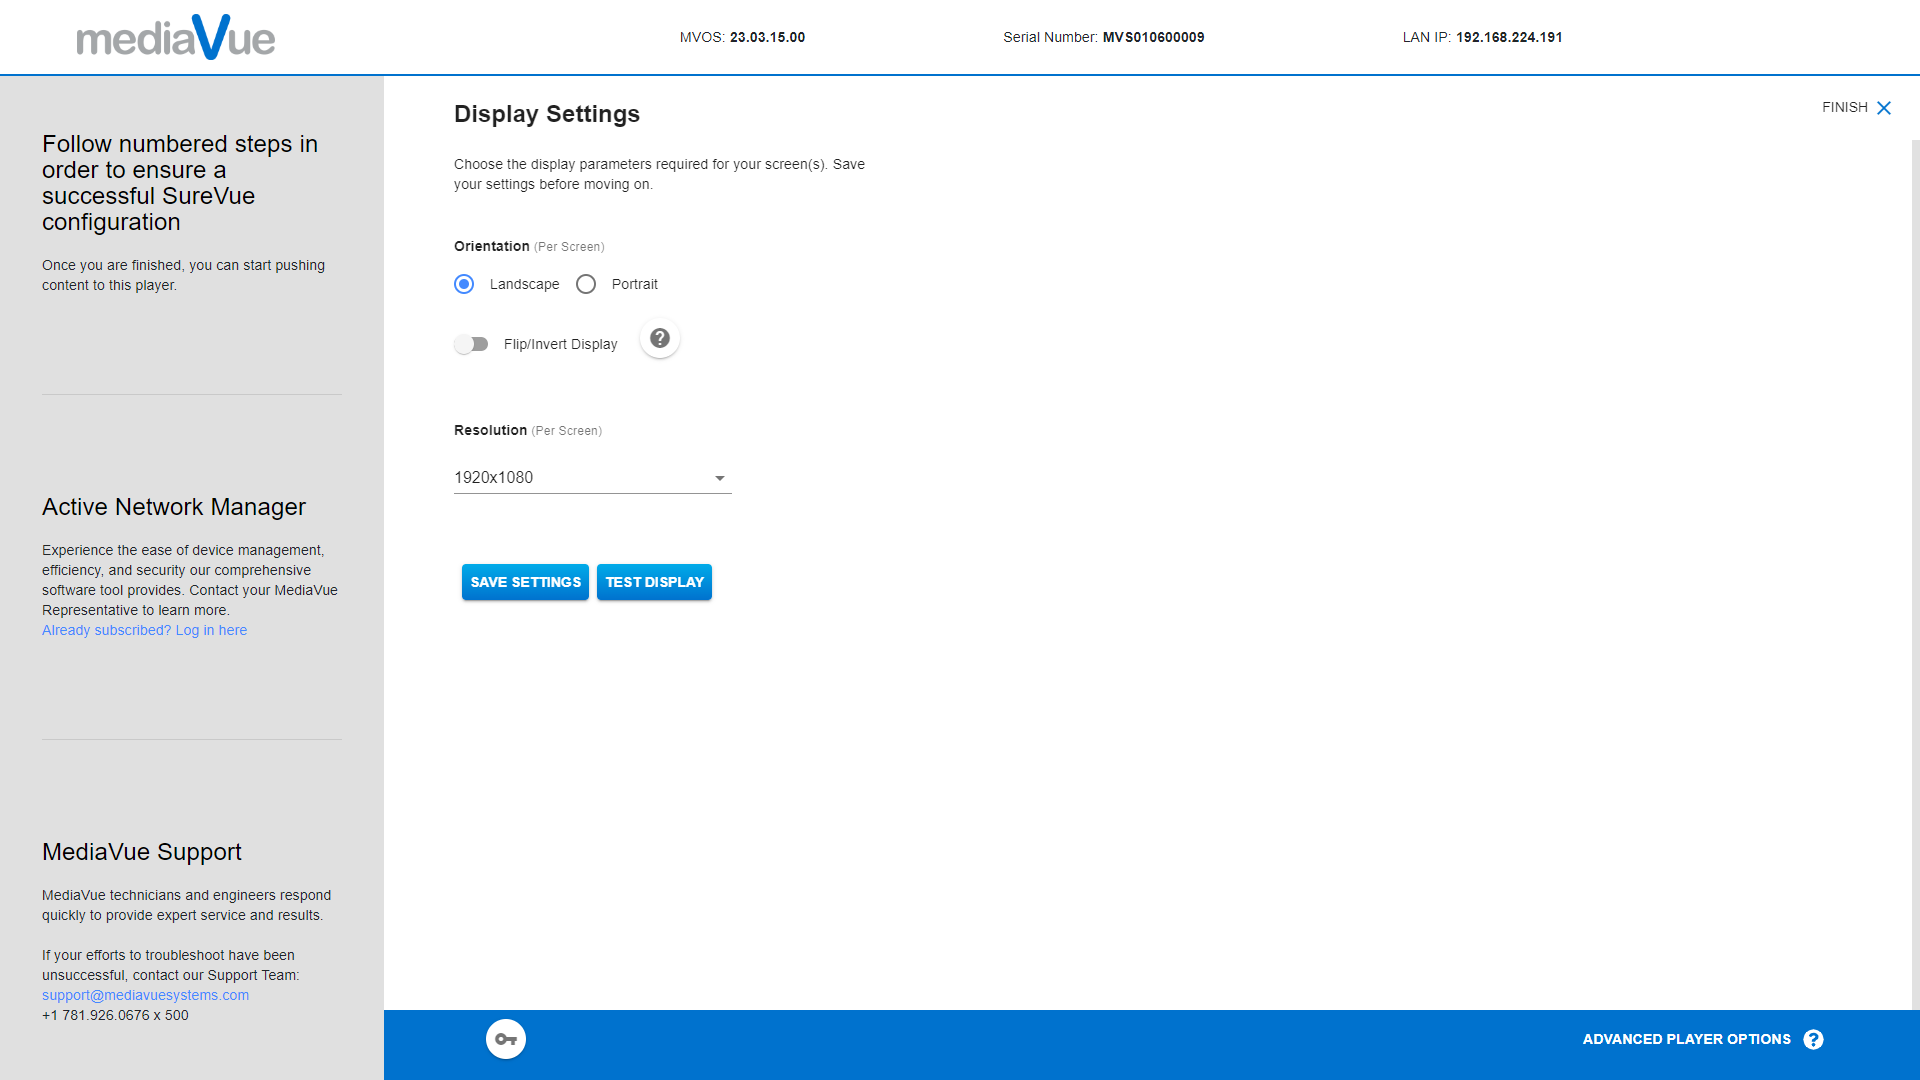
Display Configuration
The first section is the display configuration. In this section, you can select the orientation and resolution of the display(s) connected to the player. Depending on your use case, you may need to configure the display(s) in a specific orientation or resolution. The SureVue player supports a variety of resolutions, so you can select the resolution that best fits your display(s). Once you have made your selections, simply save the changes and move on to the next section. If your project requires custom resolutions, please see use following guide.
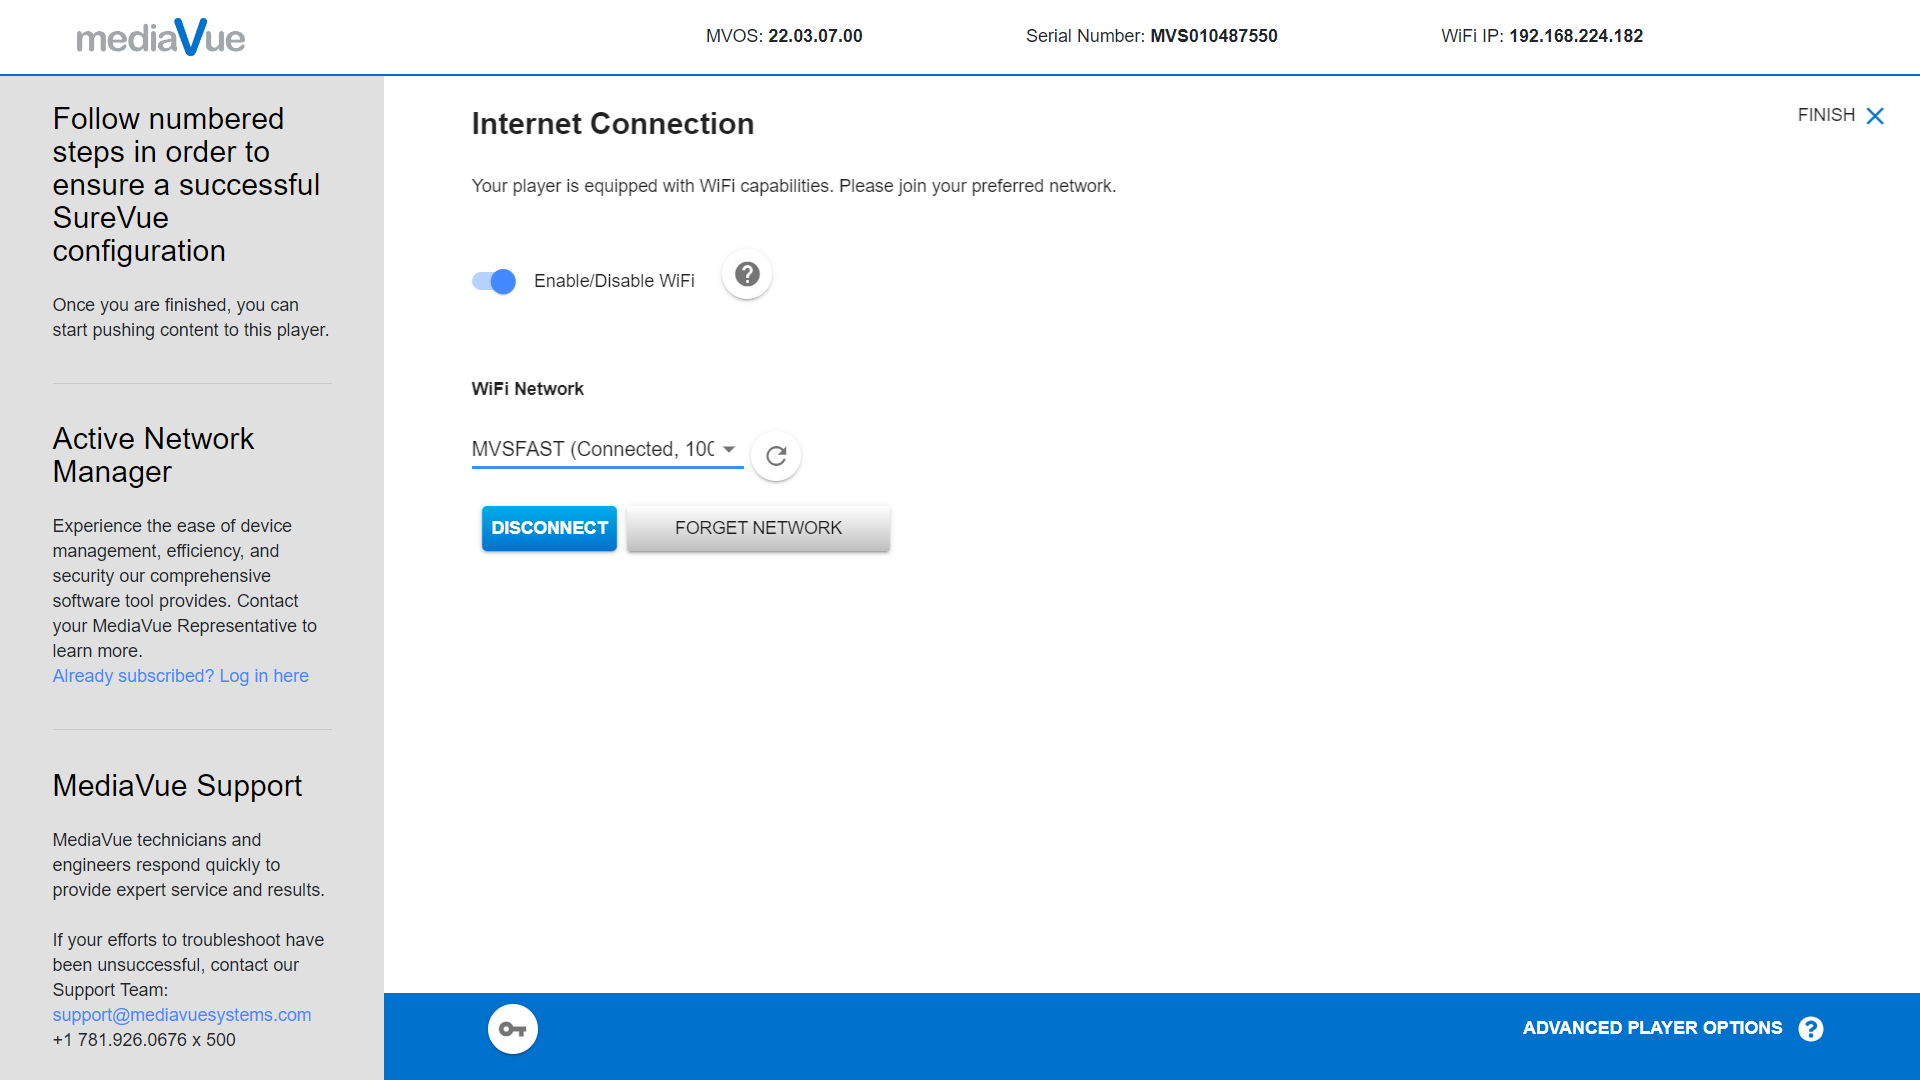
Network Settings
The second section is the network settings. In this section, you can configure the Ethernet and Wi-Fi settings. DHCP is enabled by default, which means the player will automatically obtain an IP address from your network. However, if you prefer to use a static IP address, you can enter it in this section. It is important to ensure that your SureVue player is properly connected to your network so that it can communicate with your content management system.
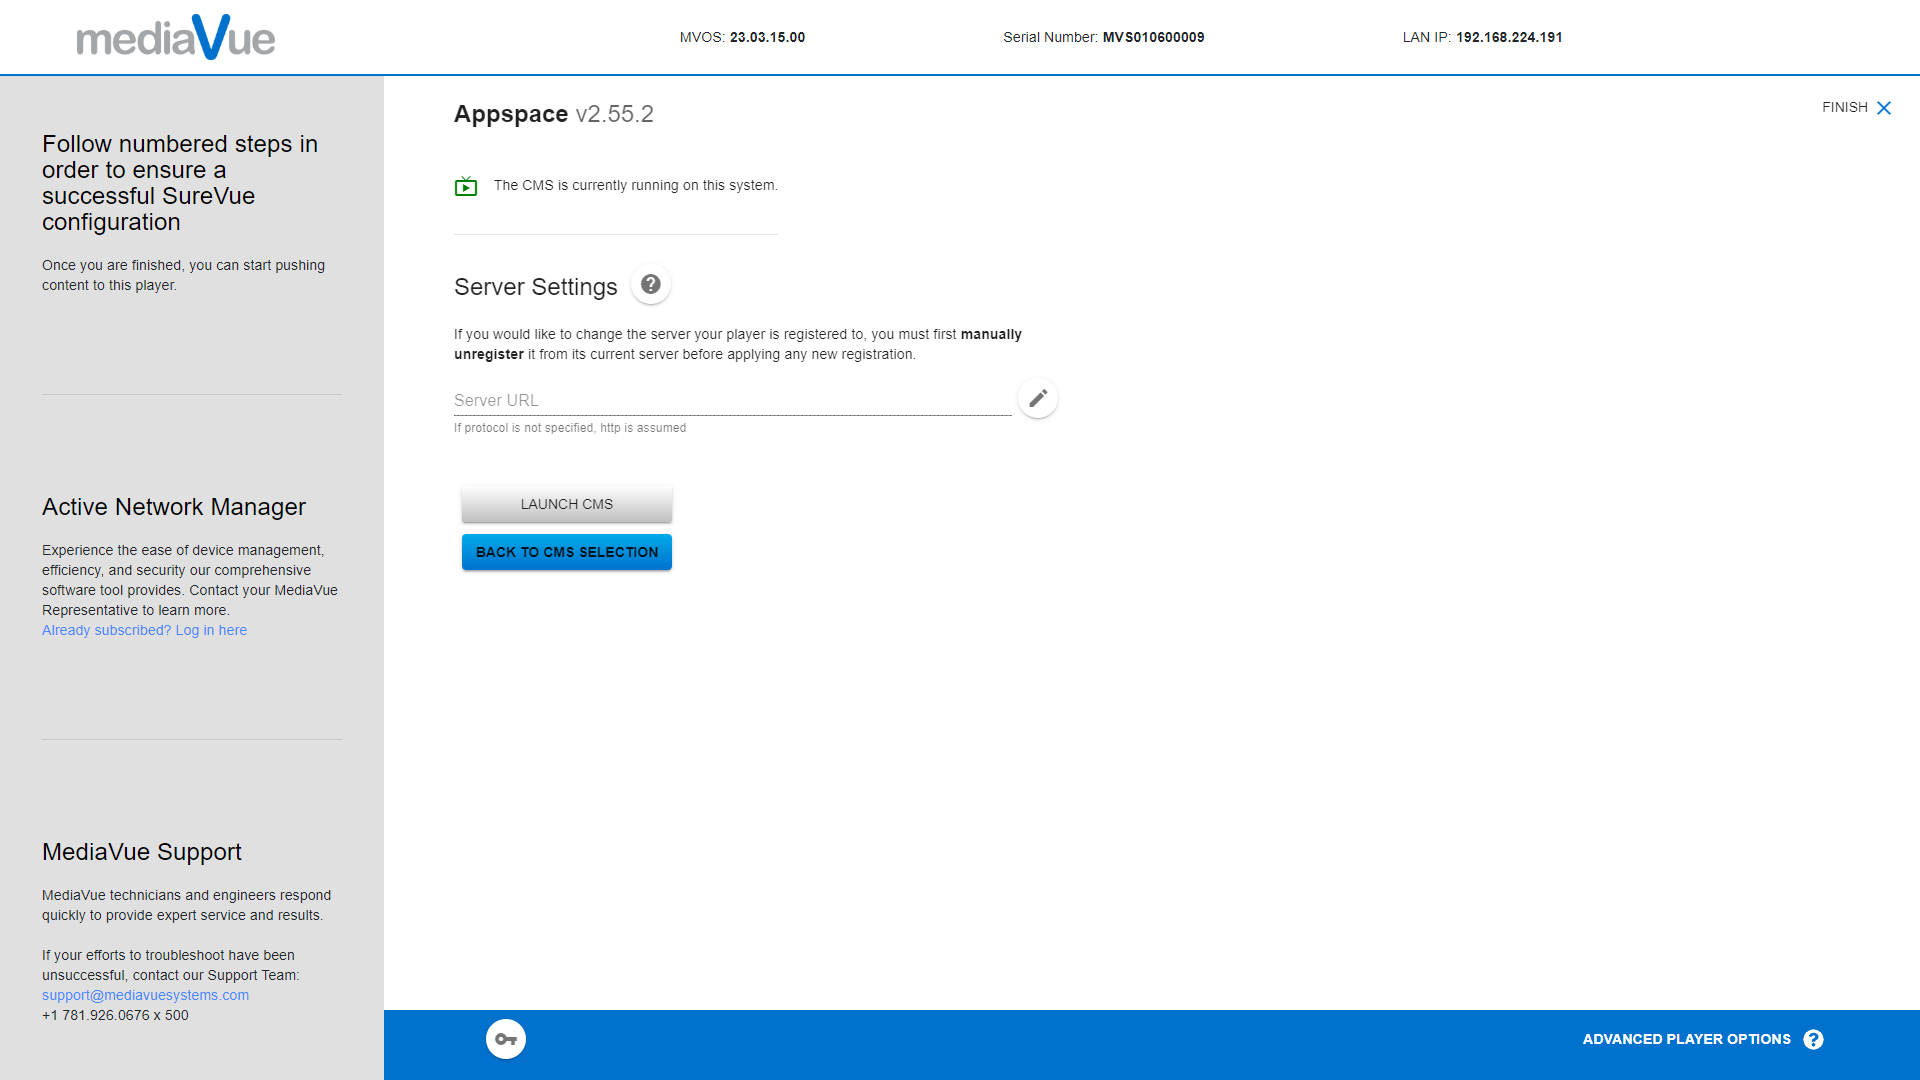
CMS Registration
The third section is the content management system configuration. To configure a CMS, you will need the server URL, username, and password. The URL can be launched directly from this section by selecting “Kiosk mode” from the drop-down. Once you have entered your credentials and selected “Launch CMS,” the player will be registered to the CMS server. From there, you can select the content application you wish to have deployed on the player. This is the most critical step in setting up your SureVue player as it ensures that your player can display the content you want.
Advanced Settings
In addition to the 1-2-3 setup, the SureVue digital signage player also offers advanced settings for users who require further device and network customization. To access these settings, simply click on the “Advanced” button located in the bottom right of the user interface.
The advanced settings include audio settings, additional network settings, such as advanced Wi-Fi settings, DNS, and proxy configurations. Advanced Wi-Fi settings allow users to configure specific wireless network settings, such as authentication and encryption methods. DNS settings allow users to specify a DNS server for resolving domain names, and proxy settings allow users to connect to the internet through a proxy server.
For more information on SureVue player hardware, please see Digital Endpoints
For more information on ANM, please see Active Network Manager